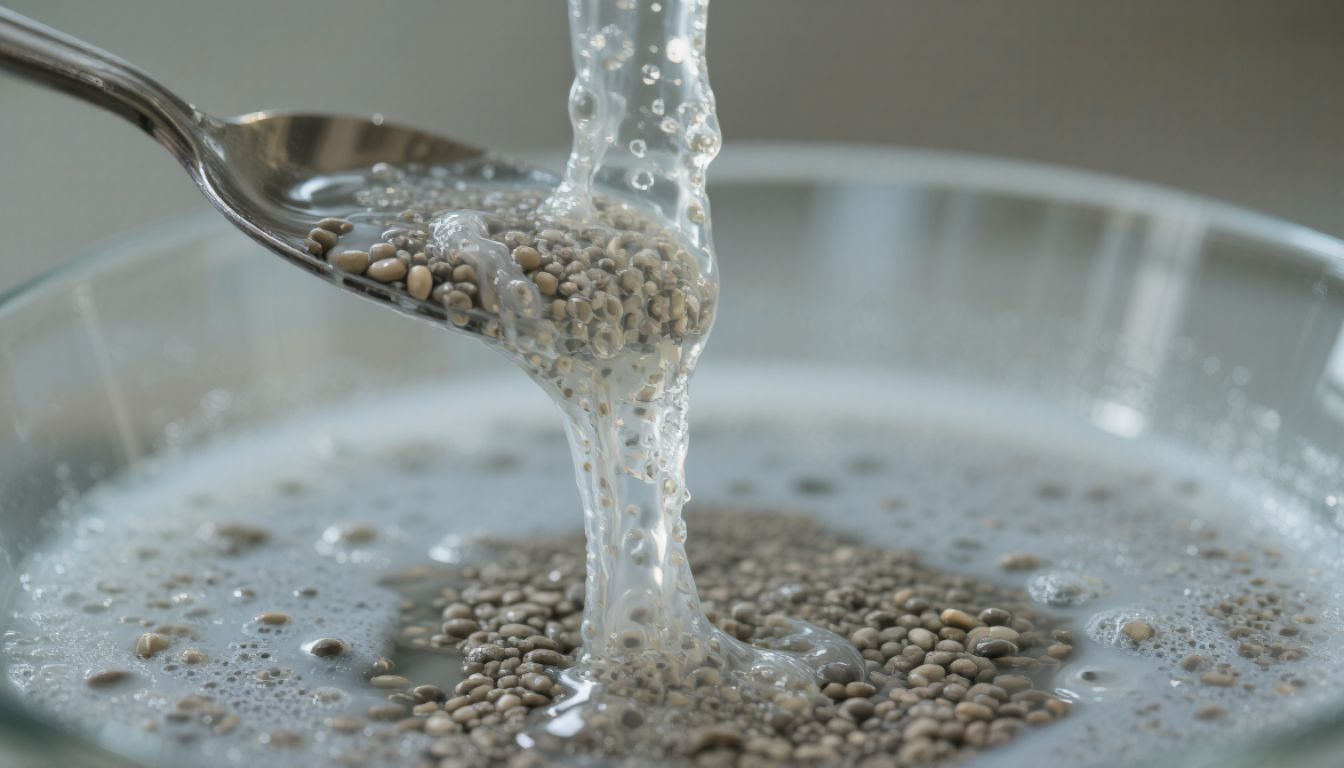
You’ve been soaking your microgreen seeds overnight because every guide told you to. But if your trays keep turning into a slimy, moldy mess within 48 hours, that pre-soak might be the culprit—not the solution.
Most beginner growers assume soaking speeds up germination and improves yields. In reality, over-hydrated seeds are drowning before they even sprout. When seeds absorb too much water too fast, their protective seed coat softens excessively, creating the perfect breeding ground for mold and bacteria. The very step you thought was helping is sabotaging your entire crop.
Why soaking microgreen seeds backfires
Seeds are designed to germinate when they encounter moisture in soil or growing medium. They’re built to wick water slowly, activating enzymes at a controlled pace. Soaking shortcuts this natural process, forcing seeds to take on water faster than their internal chemistry can handle.
Here’s what happens when you soak:
- The seed coat becomes mushy and loses its natural antimicrobial barrier
- Excess moisture pools around the seed, reducing oxygen availability
- Anaerobic bacteria and mold spores (already present in the air) multiply rapidly in the stagnant water film
- Seeds that do sprout emerge weak, pale, and prone to damping-off disease
Small seeds like broccoli, kale, and arugula are especially vulnerable. Their thin coats can’t handle the osmotic shock of a 12-hour soak. Even larger seeds like sunflower and pea—often recommended for soaking—rot faster in late December’s indoor humidity when your heating system creates inconsistent airflow.

The mold problem nobody talks about
That white fuzz appearing on day two isn’t always root hairs. Seed mold looks nearly identical to early root development, and by the time you realize the difference, your entire tray is contaminated.
Mold thrives in three conditions:
- High moisture: Soaked seeds create a waterlogged surface layer
- Poor air circulation: Dense seed coverage traps humidity
- Warm temperatures: Winter indoor heat (68–72°F) is ideal for fungal growth
When you soak seeds, you’re pre-loading them with water, then placing them in a covered tray or dome. You’ve just built a mold incubator. The blackout period—those first 2–3 days under a cover—turns into a fungal festival because there’s no light to slow microbial growth and no air movement to dry the surface.
What to do instead of soaking
Skip the soak. Dry-seed your trays and let the growing medium do the work.
Here’s the method that prevents rot:
-
Use a barely-damp growing medium: Your soil or coco coir should feel like a wrung-out sponge, not a wet towel. If you can squeeze water out, it’s too wet.
-
Spread seeds evenly but not too dense: Leave tiny gaps between seeds. Airflow between seeds prevents moisture from pooling.
-
Mist lightly after seeding: Use a fine spray bottle to dampen the seed layer—don’t drench. One or two passes is enough.
-
Weight the tray, don’t dome it: Place a second tray on top with a small weight (a book or a jar). This creates contact pressure without sealing in humidity. Leave a small gap on one side for air exchange.
-
Check daily and mist only if bone-dry: Most seeds have enough moisture from the medium. If the surface looks dusty-dry, mist lightly. If it’s still damp, leave it alone.
-
Uncover earlier: Remove the top tray as soon as you see sprouts pushing up (usually 24–48 hours). Don’t wait for full germination under cover.
This approach keeps seeds in contact with moisture without drowning them. The medium wicks water to the seed at the right pace, and airflow prevents mold from taking hold.

The exception: When soaking actually helps
There are two scenarios where a short soak makes sense:
-
Hard-coated seeds like sunflower, pea, and wheatgrass benefit from a 4–6 hour soak (not overnight). This softens the hull just enough to speed germination without over-saturating.
-
Old seeds (more than a year past harvest) may need a brief soak to rehydrate the embryo. But even then, 4 hours is the maximum.
After soaking these varieties, drain thoroughly and spread on a towel for 10 minutes to remove surface water before seeding. The goal is internal hydration, not external wetness.
How to rescue trays that are already rotting
If you’ve already soaked and seeded, and you’re seeing early signs of mold, act fast:
- Remove the cover immediately and increase air circulation (use a small fan on low, pointed away from the tray)
- Stop misting for 24 hours to let the surface dry slightly
- If mold is widespread (more than 20% of the tray), it’s often better to dump and restart than to try to save it
Mold spores spread invisibly. Even if you remove visible patches, the entire tray is likely compromised. Your time and seed are better spent on a fresh start with the dry-seed method.

The takeaway for faster, cleaner microgreens
Soaking microgreen seeds is a habit borrowed from sprouting and large-scale farming, where the goals and conditions are completely different. In a home tray setup, especially during winter when indoor humidity swings wildly, soaking creates more problems than it solves.
Start dry, keep barely damp, and let the seeds do what they’re designed to do. You’ll see faster germination, healthier greens, and zero slime. Your trays will smell fresh instead of sour, and you’ll stop wasting seeds on crops that rot before harvest.
Skip the overnight soak. Your microgreens will thank you.