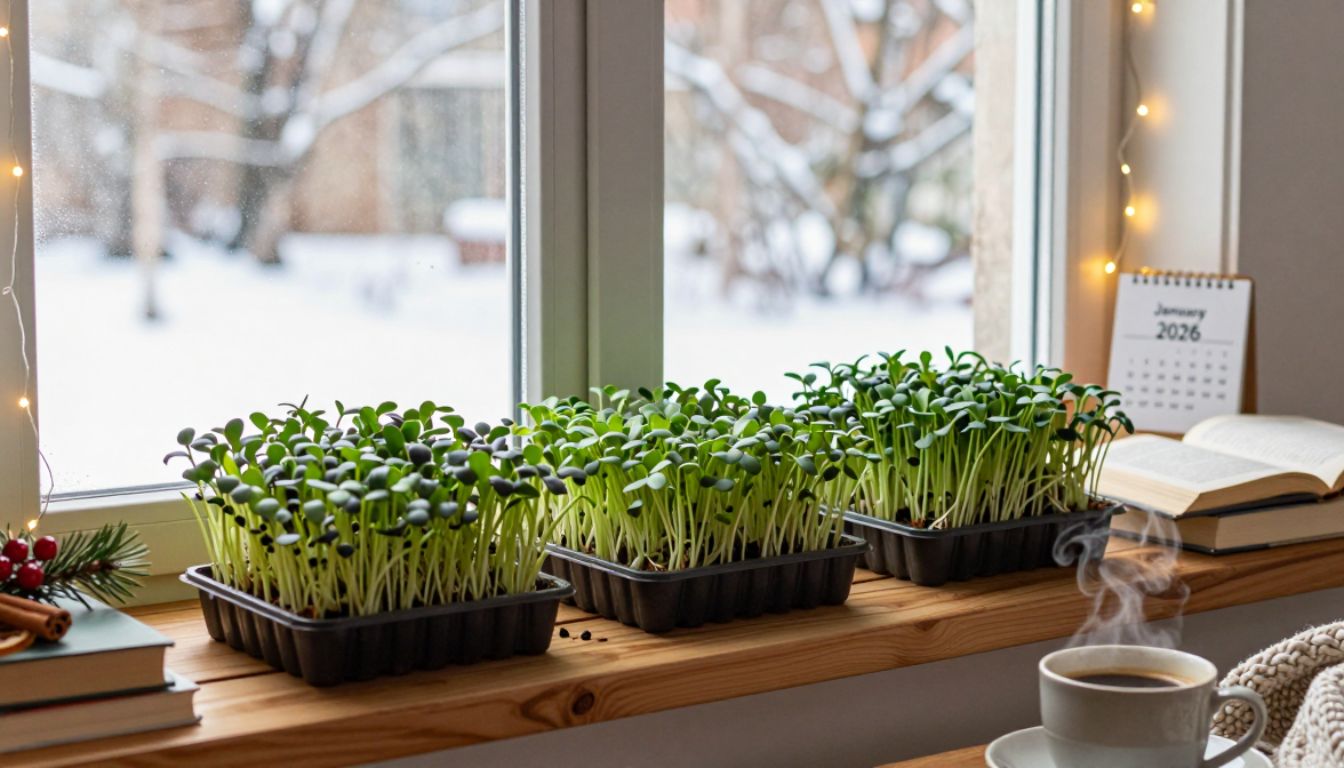
You’ve probably killed a houseplant or two. Maybe you forgot to water that basil, or your succulents turned to mush. Here’s the thing: chia microgreens don’t care about your track record. They sprout in 24 hours, green up by day four, and are ready to harvest in six to seven days—no soil, no fancy equipment, no green thumb required.
As we step into 2026, forget the gym membership you’ll abandon by February. This year, start with something you can actually finish: a windowsill garden that delivers fresh, nutrient-dense greens before your New Year’s resolutions even have time to fade.
Why chia microgreens are the ultimate beginner win
Chia seeds are absurdly forgiving. Unlike other microgreens that demand soil, drainage trays, and constant vigilance, chia grows on nothing but a damp surface. The seeds form a gel when wet, anchoring themselves without any growing medium. You literally cannot overwater them because they thrive in moisture.
They’re also ridiculously fast. Most gardening projects require weeks of patience and faith. Chia microgreens show results within a day. By day two, you’ll see tiny roots. By day four, a carpet of bright green shoots. By day six or seven, you’re harvesting.
And the nutrition? Chia microgreens pack vitamins A, B, C, and E, plus calcium, iron, magnesium, and omega-3 fatty acids. You’re not just growing a garnish—you’re growing a superfood that costs pennies per tray.
What you actually need (and it’s probably already in your kitchen)
No Amazon shopping spree required. Here’s the full list:
- A shallow container: A dinner plate, a plastic takeout lid, a small baking dish, or even a pie tin. Anything that holds a thin layer of water.
- Chia seeds: The same ones you’d put in a smoothie. Organic is ideal, but any chia seeds work. You’ll need about two tablespoons per standard dinner plate.
- Water: Tap water is fine unless yours is heavily chlorinated (let it sit out for a few hours if you’re concerned).
- A sunny windowsill: South-facing is best in the Northern Hemisphere, but any window with a few hours of indirect light works.
That’s it. No grow lights, no seed-starting mix, no humidity domes. If you have a plate and a packet of chia seeds, you’re ready.
The step-by-step method (zero experience required)
Day 1 (today, December 31, 2025): Spread two tablespoons of chia seeds evenly across your container. Don’t pile them up—aim for a single, dense layer. Add just enough water to cover the bottom of the container, about an eighth of an inch. The seeds will start absorbing water immediately and form a gel-like coating within minutes. Place the container on your windowsill.
Day 2 (January 1, 2026): Check the water level. The gel should still look glossy and wet. If it’s drying out, add a splash of water—just enough to keep the bottom moist. You’ll see tiny white roots beginning to emerge from the seeds. This is your first sign of success.
Day 3–4: The magic happens here. Green shoots will push up through the gel. By day four, you’ll have a miniature forest of bright green stems, each topped with two tiny leaves. Keep the water level consistent—chia likes to stay damp but not submerged.
Day 5–6: The greens will grow taller, reaching two to three inches. The stems will thicken, and the leaves will open wider. If your windowsill gets strong afternoon sun, you might notice the greens leaning toward the light. Rotate the container once a day for even growth.
Day 7 (January 6, 2026): Harvest time. Use clean kitchen scissors to snip the greens just above the gel line. Rinse them gently under cool water, pat dry, and use immediately or store in the fridge in a sealed container for up to three days.

What to do when things don’t go perfectly (because they might not)
The seeds dried out: Chia needs consistent moisture, especially in the first three days. If the gel looks crusty, add a bit more water. The seeds are surprisingly resilient—they’ll often bounce back even after a dry spell.
Mold appeared: This usually happens if the container has no airflow or if the seeds are piled too thick. If you see fuzzy white or gray patches, toss the batch and start over. Next time, spread the seeds thinner and place the container where it gets gentle air circulation (not in a closed cabinet).
The greens are pale or leggy: Not enough light. Move the container closer to the window or try a different windowsill. Chia microgreens need at least four to six hours of indirect sunlight daily. If it’s the dead of winter and your windows are dim, a small desk lamp with a daylight bulb can help.
Nothing sprouted: Check the seed freshness. Old chia seeds (past their prime by a year or more) can lose viability. Also, if your water is very cold, germination slows. Use room-temperature water.
How to use your harvest (beyond the obvious salad)
Chia microgreens have a mild, slightly nutty flavor with a tender, delicate texture. They’re not as peppery as radish microgreens or as earthy as sunflower shoots—they’re gentle enough to pile onto almost anything.
- Smoothie bowls: Sprinkle a handful on top for crunch and color.
- Avocado toast: Layer them over mashed avocado with a squeeze of lemon and flaky salt.
- Eggs: Fold them into scrambled eggs in the last 30 seconds of cooking, or pile them onto a fried egg.
- Sandwiches and wraps: Use them like lettuce, but with more nutrition and less bulk.
- Grain bowls: Top rice, quinoa, or farro bowls with a generous handful.
- Soups: Add them at the very end, right before serving, so they stay fresh and crisp.
You can also juice them or blend them into pestos and dressings, though eating them whole gives you the fiber and full nutrient profile.
Why this is the perfect New Year’s ritual
Most New Year’s goals fail because the feedback loop is too slow. You join a gym and see no results for weeks. You start a budget and won’t know if it worked until March. You commit to reading more, but life gets busy and the book sits on your nightstand.
Chia microgreens give you a win in less than a week. You plant them on New Year’s Eve, and by January 6, you’re eating something you grew with your own hands. That dopamine hit—watching something green and alive emerge from a handful of seeds—is enough to make you want to try again. And again.
By the time February rolls around, you’ll have grown four or five trays. You’ll have a rhythm. You’ll have confidence. And maybe, just maybe, you’ll feel ready to try basil or cilantro or that fiddle-leaf fig you’ve been eyeing.
Start today (yes, today)
You don’t need to wait for the perfect container or the perfect seeds or the perfect moment. Grab a plate, grab some chia seeds, add water, and put it on your windowsill. By the time the New Year’s champagne has gone flat, you’ll have a tray of bright green life proving that you can, in fact, grow something.
Welcome to 2026. Let’s start it with something green.