
Most guides tell you how fast microgreens grow. Almost none tell you how to make them taste better. But the truth is, where and how you grow chia microgreens changes their flavor and texture—and a simple windowsill setup often beats fancy grow lights when it comes to producing crisp, clean-tasting greens.
The difference isn’t magic. It’s plant stress, moisture control, and light intensity. And once you understand the basics, you can tweak your setup to grow chia microgreens that actually taste good, not just green.
Why flavor matters more than speed
Most indoor growers obsess over germination time and harvest weight. But chia microgreens grown too fast—under intense heat or harsh light—often taste bitter, feel rubbery, or develop a slimy texture that ruins salads and sandwiches.
Flavor and texture are shaped by how the plant handles stress. When chia seedlings are exposed to high heat, drying air, or sudden light changes, they produce more defensive compounds (like oxalates and tannins) that create bitterness. When they’re waterlogged or grown in stagnant air, bacterial growth accelerates, leading to off-flavors and slime.
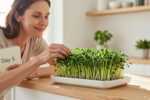
A windowsill, by contrast, offers something valuable: steadier conditions. Indoor temperatures near a window tend to stay moderate (60–72°F in winter in most US homes). Light is gentle and indirect for most of the day. And because you’re walking past the tray regularly, you’re more likely to notice problems early—before they ruin the batch.

What actually changes the taste
Three factors control flavor and crispness in chia microgreens:
Light intensity and duration. Too much direct sun scorches stems and triggers bitterness. Too little light produces pale, flavorless greens. Chia does best with 6–8 hours of indirect or filtered light—exactly what most windowsills provide in January.
Moisture consistency. Chia seeds form a gel coat when wet, which helps them germinate—but also traps moisture. If the tray stays too wet, stems stay soft and bacteria thrive. If it dries out suddenly, stems turn woody. The sweet spot is damp, not soaked, with daily venting to let excess moisture escape.
Temperature stability. Chia microgreens grown at steady 65–70°F develop tender stems and a mild, nutty flavor. Swings above 75°F or below 55°F stress the plant, changing its chemistry. Windowsills in heated homes naturally buffer these swings better than garages, basements, or outdoor spots in early January.
The flavor-first windowsill setup
You don’t need expensive equipment. Here’s what works:
- A shallow tray (1–2 inches deep) with drainage holes or a mesh bottom.
- Organic potting mix or coconut coir, lightly moistened (not dripping).
- Chia seeds, spread evenly—about 1 tablespoon per 10×10-inch tray.
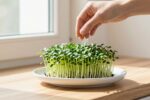
- A spray bottle for gentle daily misting.
- A clear lid or plastic wrap for the first 2–3 days (humidity dome).
Placement matters. Choose a windowsill that gets morning or late-afternoon light, not harsh midday sun. East or west-facing windows work best in the US during winter. If your window gets very cold at night, move the tray a few feet back into the room after sunset.
Avoid these mistakes:
- Placing the tray in direct sun for more than 2 hours—stems scorch and taste bitter.
- Leaving the lid on past day 3—trapped moisture causes slime.
- Watering from above after germination—mist lightly or bottom-water to keep stems dry.
The 6-day flavor-focused method
Day 1 (January 3, 2026): Spread seeds on damp soil. Mist lightly. Cover with a clear lid or plastic wrap. Place on your windowsill. No direct sun yet.
Day 2: Seeds will swell and start to sprout. Keep the lid on. Check once—if condensation is heavy, crack the lid for 10 minutes, then re-cover.
Day 3: Remove the lid completely. Stems should be 0.5–1 inch tall, pale yellow or light green. Move the tray into indirect light. Mist lightly once in the morning. Smell check: it should smell fresh, like wet soil—not sour or musty.
Day 4–5: Greens will turn bright green and grow to 1.5–2 inches. Mist once daily, early in the day so stems dry by evening. Texture check: gently pinch a stem—it should feel firm and crisp, not limp or slimy. If you see any white fuzz (mold), increase airflow and reduce misting.
Day 6: Harvest time. Greens should be 2–3 inches tall, with fully open cotyledon leaves (the first pair of “seed leaves”). Taste test: snip a small bunch and chew slowly. You should taste mild nuttiness, a hint of sweetness, and a clean crunch—no bitterness, no slime, no off-flavors.
If they taste bitter, your next batch needs less light or cooler temps. If they taste bland, increase light by 1–2 hours or move the tray slightly closer to the window.
How to keep the crunch after harvest
Even perfectly grown chia microgreens lose texture fast if stored wrong.
Harvest in the morning after the dew has dried (if you misted the night before, wait 2 hours). Use clean scissors and cut just above the soil line.
Rinse gently in cool water to remove any soil or seed hulls. Shake off excess water.
Dry thoroughly. Lay greens on a clean kitchen towel or use a salad spinner. Wet greens wilt and spoil within hours.
Store in a breathable container. A glass jar with a paper towel at the bottom works well, or a produce bag with small holes. Keep in the fridge. Use within 3–5 days for best flavor and crunch.
Try a simple taste test
If you’re skeptical that location changes flavor, run a side-by-side test. Grow one tray on your windowsill and one under a bright grow light or in a darker corner. Harvest both on day 6 and taste them blind.
Most people notice the windowsill batch tastes cleaner and crisper—less bitter, more balanced. The difference isn’t huge, but it’s real, and it comes from steadier conditions and gentler light.
You can also test moisture: grow one tray with daily misting and one with heavy watering. The misted tray almost always wins on texture.
Why this matters now
In early January, windowsills in the US offer ideal conditions for chia microgreens. Outdoor temperatures are cold, so indoor air near windows stays cool and stable. Daylight is shorter, so you avoid the risk of over-lighting. And because winter produce is expensive and often shipped long distances, homegrown microgreens give you fresh, flavorful greens for pennies.
The science isn’t complicated. Steady temps, gentle light, and controlled moisture reduce plant stress—and less stress means better flavor. A windowsill naturally provides all three, as long as you avoid the common mistakes (too much sun, too much water, not enough airflow).
Start a tray this week. Follow the 6-day method. Taste the difference on day 6. If the flavor is clean and crisp, you’ve dialed in your setup. If not, tweak one variable—light, water, or temperature—and try again. Within two or three batches, you’ll be growing chia microgreens that taste better than anything you can buy at the store.
And once you’ve mastered chia, the same principles apply to radish, broccoli, and mustard microgreens. Flavor first. Speed second. The windowsill is your lab.