Most people underestimate how dramatic chia microgreens change in less than a week. Here’s the exact 6-day windowsill setup—and what you’ll see each day—so you can replicate the ‘after’ without slime or rot.
Chia seeds transform from dormant specks into vibrant, edible greens faster than almost any other microgreen. The entire journey happens on your kitchen windowsill in just six days, with no soil, no special equipment, and almost no effort. But the difference between a crisp, clean harvest and a slimy mess comes down to three small habits most beginners skip.
This guide walks you through the exact setup and day-by-day checkpoints so you know what to expect—and what to adjust—at every stage.
What day 0 vs day 6 actually looks like
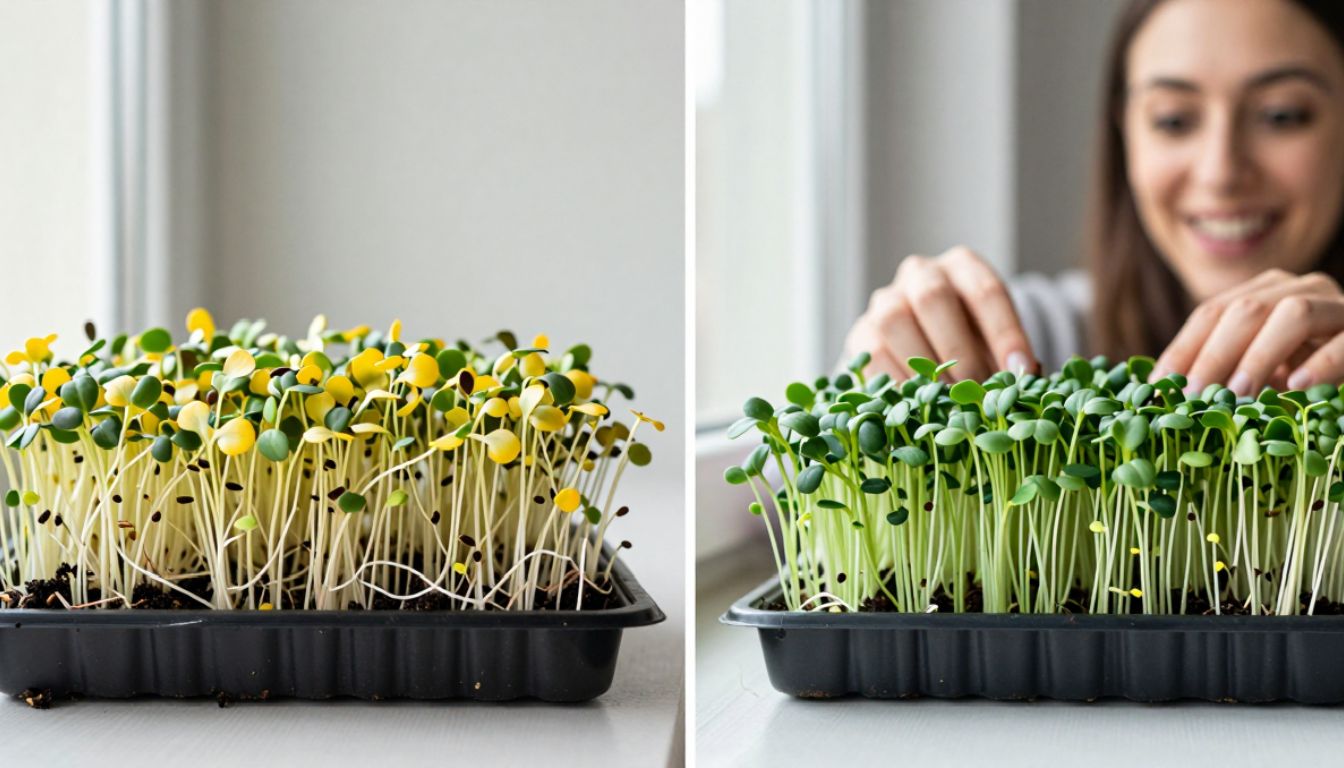
On Day 0, you’re looking at a shallow tray scattered with tiny brown seeds, barely visible against damp paper towel or coco coir. The surface looks almost bare.
By Day 6, that same tray is a dense carpet of bright green stems, each topped with delicate oval leaves. The microgreens stand 2 to 3 inches tall, ready to harvest with scissors. The transformation is so complete that first-timers often double-check they’re looking at the same container.
The secret isn’t luck or a green thumb. It’s moisture control and air circulation—two things you can dial in from the start.

The 60-second setup
You need five things, all of which you probably already own:
- A shallow dish or tray (8×8 inches or larger, no drainage holes needed)
- Growing medium: unbleached paper towels (2–3 layers) or a thin layer of coco coir
- 2 tablespoons of chia seeds (organic or regular, both work)
- A spray bottle filled with clean water
- A cover: plastic wrap, a clear lid, or an inverted tray
Lay your paper towels or coco coir in the tray and mist until damp but not puddled. Sprinkle the chia seeds evenly across the surface—they don’t need to be buried, just in contact with moisture. Mist lightly once more, then cover. Place the tray on a windowsill that gets indirect sunlight (direct sun will overheat the cover and cook the seeds).
That’s it. The setup takes less than a minute.
Day-by-day checkpoints
Day 1: The swell
Seeds absorb water and swell to nearly double their size. Each seed develops a translucent gel coat—this is normal and actually helps retain moisture. You won’t see roots yet, but the seeds should look plump and stuck to the medium.
Action: Mist lightly if the surface looks dry. Keep the cover on.
Day 2: First roots emerge
Tiny white roots poke out from the seeds and anchor into the paper towel or coir. The gel coat is still visible. Some seeds may show a faint crack where the sprout will emerge.
Action: Lift the cover for 30 seconds to vent excess humidity, then mist and re-cover. This brief airing prevents mold without drying out the seeds.
Day 3: Sprouts break through
Pale yellow-green shoots push up from the seeds. They’re fragile and translucent, leaning toward the light. The root mat thickens underneath.
Action: Vent for 1 minute, mist the surface (not the sprouts directly), and re-cover. Check that the medium is still damp; if it’s drying out, add a tablespoon of water to the bottom of the tray.
Day 4: The green-up
Sprouts straighten and begin to turn green as chlorophyll kicks in. You’ll see the first true leaves (cotyledons) starting to unfold. Growth accelerates noticeably.
Action: Remove the cover for good. The microgreens need air circulation now to stay crisp. Continue misting once or twice a day, focusing on the base and roots.
Day 5: Leaf expansion
The cotyledons open fully, and the stems lengthen. The tray starts to look like a miniature forest. The color deepens to a vibrant green.
Action: Mist once in the morning. If the roots look dry, add a small amount of water to the tray bottom (bottom-watering reduces the risk of mold on the leaves).
Day 6: Harvest-ready
Microgreens stand 2 to 3 inches tall with fully open leaves. The flavor is mild, slightly nutty, and the texture is crisp. This is peak harvest time—waiting longer can lead to tougher stems.
Action: Snip with clean scissors just above the root line. Rinse gently, pat dry, and use immediately or store.
The ‘keep it clean’ rule
Moisture from below, air from above. That’s the mantra.
Chia seeds are mucilaginous—they produce that gel coat when wet. This is helpful for germination but can trap stagnant air and invite mold if you over-mist the tops after Day 3.
Best practice: Once sprouts emerge on Day 3, switch to bottom-watering. Pour a small amount of water (1–2 tablespoons) directly into the tray, letting the roots wick it up. Mist the surface only if it looks bone-dry.
Daily venting: From Day 2 to Day 3, lift the cover briefly each day. This 30-second habit releases trapped CO₂ and prevents the “swamp” smell that signals trouble.
Fast fixes for common problems
If it looks slimy: You over-watered or didn’t vent enough. Remove the cover immediately, tilt the tray to drain excess water, and move it to a spot with better air circulation. Salvage what you can; the rest may need to be composted.
If it dries out: The medium pulled away from the tray edges, or you skipped a misting. Add water to the tray bottom (not the top) and mist lightly. The roots will recover within a few hours if caught early.
If it gets leggy: The windowsill isn’t bright enough, or the cover stayed on too long. Move the tray closer to the window (still indirect light) and remove the cover by Day 4 at the latest. Leggy greens are still edible, just less sturdy.

Start tonight, harvest on day 6
Chia microgreens are one of the fastest, most forgiving indoor gardening projects you can try in early 2026. They don’t require soil, grow lights, or a complicated feeding schedule. Just a windowsill, a spray bottle, and six days.
Once you harvest, rinse the greens in cool water and spin or pat them dry. Use them fresh in salads, sandwiches, or smoothies—they add a mild crunch and a nutritional boost (chia microgreens are rich in omega-3s, fiber, and antioxidants).
Storage tip: Wrap harvested greens in a damp paper towel, place them in an airtight container, and refrigerate. They’ll stay crisp for 3 to 5 days.
If you start tonight, you’ll be snipping fresh greens by next week. And once you see that Day 0 to Day 6 transformation in person, you’ll understand why chia microgreens are taking over windowsills across the country this winter.