
Scroll through any gardening corner of Youtube, TikTok or Instagram right now, and you’ll see the same thing: tiny trays of chia microgreens, lush and green, promising superfood nutrition in just seven days. Influencers swear by them. Health gurus call them the “easiest microgreen for beginners.” But here’s what no one tells you: by Day 4, most people’s trays turn into a slimy, moldy mess—and they have no idea why.
If you’ve tried growing chia microgreens and ended up with a gelatinous disaster instead of a crisp harvest, you’re not alone. The problem isn’t you. It’s a single, fixable mistake that happens in the first 72 hours.
Why chia microgreens fail when others succeed
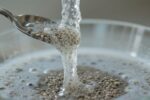
Chia seeds are different from sunflower, broccoli, or radish microgreens in one critical way: they’re mucilaginous. The moment they touch water, they release a gel-like coating. That gel is natural—it’s how chia survives in the wild—but in a shallow tray with poor airflow, it becomes a breeding ground for bacteria and mold.
Most beginners soak chia seeds the same way they’d soak other microgreens. Big mistake. Chia seeds should never sit in standing water. They need moisture, not submersion. When you over-water or use a tray without drainage, that gel turns into slime by Day 3 or 4, suffocating the roots and inviting fungal growth.
The second mistake? Misting from above after germination. Water droplets sit on top of the gel layer, creating a humid, stagnant microclimate. By the time you notice the smell or the white fuzz, it’s too late.

The Day 4 checkpoint: what to look for
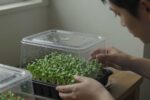
Day 4 is the make-or-break moment for chia microgreens. If you’ve done it right, your seeds will have sprouted into a dense mat of tiny green shoots, standing upright with visible roots underneath. The gel will have mostly dried or absorbed.
If you’ve done it wrong, you’ll see:
- A slimy, translucent layer covering the seeds
- A sour or musty smell when you lift the tray
- White or gray fuzz starting to creep across the surface
- Seeds that haven’t sprouted, stuck together in clumps
Once slime or mold sets in, there’s no saving the tray. You have to dump it and start over. But the good news? You can prevent all of this with one simple adjustment.
The single fix that prevents rot, slime, and mold
Use a terracotta or unglazed ceramic tray instead of plastic, and water from the bottom only.
Here’s the method that works:
- Spread chia seeds in a single, even layer on a dry terracotta tray or unglazed dish. Don’t pre-soak.
- Mist lightly with a spray bottle—just enough to dampen the seeds, not flood them.
- Cover with a humidity dome or second tray for 24 hours to encourage germination.
- After Day 1, remove the cover and place the tray in indirect light.
- Water from below by setting the terracotta tray inside a shallow dish of water for 10–15 minutes, once per day. The clay wicks moisture upward without drowning the seeds.
- Never mist the greens directly after Day 2. Let the roots do the work.
Terracotta is porous. It absorbs excess moisture and allows airflow, which keeps the gel from turning into slime. Plastic trays trap humidity. That’s the difference.
If you don’t have terracotta, use a mesh sprouting lid on a mason jar, or grow chia on a thin layer of coconut coir in a tray with drainage holes. The key is airflow and bottom-watering.
What to do if you’re already seeing slime
If you’re reading this on Day 3 or 4 and your tray is starting to smell funky, here’s the triage:
- Tilt the tray and drain off any standing water immediately.
- Increase airflow by moving the tray to a spot with gentle ventilation (not direct wind).
- Stop misting entirely. Let the surface dry out slightly.
- Check again in 12 hours. If the slime hasn’t spread and the greens are still upright, you might salvage it. If the smell gets worse or mold appears, compost it and start fresh.
Don’t beat yourself up. Even experienced growers lose trays. The learning curve with chia is steep, but once you nail the watering rhythm, they’re incredibly low-maintenance.
Why chia microgreens are worth the effort
Despite the tricky start, chia microgreens are nutrient-dense and fast. They’re ready to harvest in 7–10 days, and they’re packed with omega-3 fatty acids, fiber, and antioxidants. They taste mild and slightly nutty—great on salads, smoothies, or avocado toast.
They’re also one of the few microgreens you can grow without soil, which makes them ideal for small apartments or anyone who wants to avoid the mess of potting mix.
Once you get past Day 4 without slime, the rest is easy. By Day 7, you’ll have a thick mat of greens ready to snip with scissors. Rinse them gently under cold water (the gel rinses right off), pat dry, and store in the fridge in a breathable container. They’ll keep for 3–5 days.

The beginner-friendly alternative: try these instead
If you’ve failed with chia twice and you’re ready to throw in the towel, consider starting with broccoli or radish microgreens instead. They don’t produce mucilage, they tolerate beginner mistakes, and they grow just as fast.
Once you’ve built confidence with those, circle back to chia. You’ll have a better feel for moisture levels, airflow, and timing—and you’ll be far less likely to hit that Day 4 failure point.
Your chia microgreens checklist
Print this out or save it to your phone before your next attempt:
- Use terracotta, unglazed ceramic, or a tray with drainage
- Spread seeds in a single layer, no pre-soaking
- Mist lightly on Day 1 only
- Cover for 24 hours, then uncover
- Water from below starting Day 2
- Never mist the greens after germination
- Harvest on Day 7–10 when greens are 2–3 inches tall
That’s it. No fancy grow lights, no expensive trays, no complicated schedules. Just a shift in how you water.
The bottom line
Chia microgreens are everywhere right now because they look easy. But the mucilage gel that makes chia seeds so healthy also makes them prone to slime and mold if you water them like every other microgreen.
The fix is simple: bottom-watering in a porous tray. That one change eliminates 90% of beginner failures.
If you’ve been blaming yourself, stop. You weren’t doing it wrong—you just didn’t know chia plays by different rules. Now you do.
Grab a terracotta saucer, a packet of organic chia seeds, and try again. This time, you’ll make it past Day 4.