I stared at my third tray of slimy, moldy microgreens and wanted to quit. The smell hit me first—sour, damp, like something had died in my kitchen. I’d followed the instructions. I’d watched the YouTube videos. And yet, here I was again, scraping rotting seedlings into the trash while my partner asked if we were “still doing the salad thing.”
If you’ve killed a tray of microgreens, you already know the shame. These are supposed to be the easiest plants on earth. They grow in a week. They don’t need soil. A child could do it. Except I couldn’t. Not the first time, not the second, and definitely not the third.
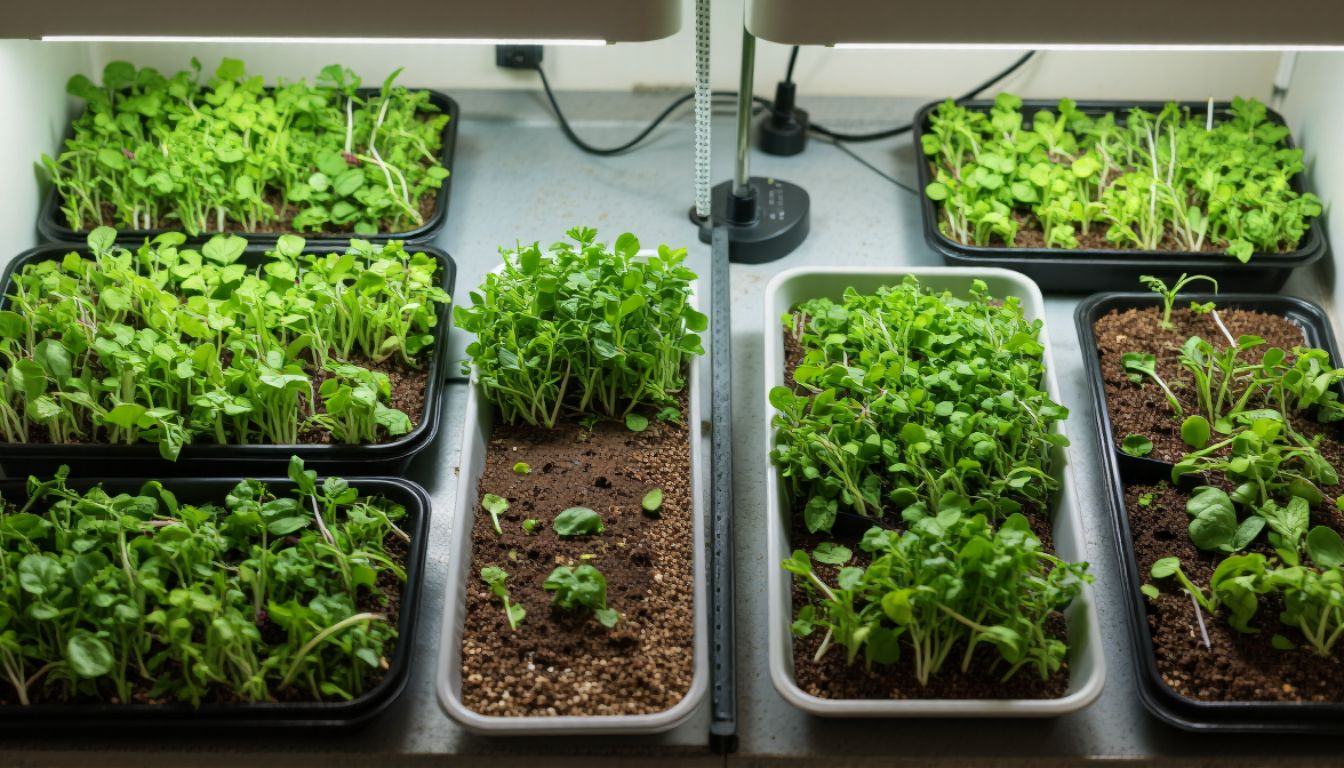
But then I found the fix. And six days later, I had a tray so thick with greens I could barely see the bottom. Here’s what I got wrong—and what finally worked.
The three mistakes that killed my microgreens
Mistake one: I soaked the seeds too long. I thought more water meant faster germination. Wrong. Most microgreens need 4–8 hours max. I was leaving mine overnight, sometimes 12 hours. By the time I planted them, they were waterlogged and prone to rot.
Mistake two: I used too much water during the blackout period. After planting, you’re supposed to cover the tray and keep it dark for 2–4 days. I misted mine twice a day, thinking I was being helpful. Instead, I created a mold factory. The seeds need moisture, not a swamp.
Mistake three: I didn’t use a weight. This was the biggest one. During the blackout phase, microgreens need pressure to develop strong roots and thick stems. Without it, they grow leggy and weak. I skipped this step entirely because no one explained why it mattered.
These three errors compounded. Oversoaked seeds + too much water + no weight = slime, mold, and failure.

The 6-day fix that actually works
Here’s the method I use now. It’s not complicated, but every step matters.
Day 1: Soak and plant
– Soak seeds for 4–6 hours in cool water (not overnight).
– Drain completely.
– Spread seeds evenly over a tray with 1–1.5 inches of moistened growing medium (I use coconut coir).
– Mist lightly with a spray bottle—just enough to dampen the surface.
– Cover with another tray (the weight) and place in a dark spot.
Days 2–3: Blackout phase
– Leave the weight on. No peeking.
– Check once per day by lifting the tray briefly. If the surface looks dry, mist lightly. If it looks wet or shiny, leave it alone.
– The seeds should start sprouting by day 2.
Day 4: Uncover and introduce light
– Remove the weight.
– Move the tray to indirect light (a windowsill works, or 12 inches under a grow light).
– Water from the bottom: pour water into a shallow tray and let the growing medium wick it up for 10–15 minutes. Dump any excess.
Days 5–6: Watch them explode
– Water from the bottom once per day, usually in the morning.
– By day 5, you’ll see true leaves forming.
– By day 6, most varieties (radish, broccoli, mustard) are ready to harvest.
Why this method works
The weight creates downward pressure, forcing roots to dig deep and stems to grow thick. Without it, seedlings stretch upward too fast and collapse.
Bottom watering prevents mold. When you mist from above, water sits on the leaves and stems, creating the damp conditions mold loves. Bottom watering keeps the roots hydrated without soaking the greens.
Short soaking times prevent seed rot. Most microgreen seeds have thin shells that absorb water quickly. Over-soaking drowns them before they even sprout.

The varieties that forgive beginners
Not all microgreens are created equal. Some are bulletproof. Others punish every mistake.
Start with these:
– Radish: Fast (5–7 days), spicy, nearly impossible to kill.
– Broccoli: Mild flavor, dense growth, very forgiving.
– Mustard: Tangy, vigorous, handles slight overwatering.
Avoid these until you’ve got a few trays under your belt:
– Basil (slow, prone to damping off)
– Cilantro (needs scarification, inconsistent germination)
– Beets (slow, requires more light)
What to do if you see mold
If you catch white fuzz early, it might not be mold—it could be root hairs. Root hairs are thin, wispy, and grow in straight lines from the roots. Mold is cottony, spreads in patches, and smells sour.
If it’s mold:
– Increase airflow immediately (point a small fan toward the tray).
– Stop misting from above.
– Switch to bottom watering only.
– If the mold is widespread, toss the tray and start over. Don’t compost it—mold spores spread.

The gear that made the difference
You don’t need much, but these items matter:
- 10×20 trays with drainage holes (I use Bootstrap Farmer trays—sturdy and reusable).
- Solid trays for bottom watering (the same 10×20 size, no holes).
- A spray bottle for the first few days.
- Coconut coir or seed starting mix (not garden soil—it’s too heavy and holds too much water).
- A second tray or a flat weight (a book wrapped in foil works too).
Total cost: under $30 for a reusable setup.
What I do now
I run two trays on rotation. Every three days, I start a new tray. By the time one is ready to harvest, the next is halfway through the blackout phase. I keep radish and broccoli in constant supply—they go on eggs, sandwiches, salads, and grain bowls.
I also stopped trying to grow everything. I’m not interested in sunflower shoots or pea shoots right now. I focus on the fast, reliable varieties that fit my cooking. That’s the other lesson: you don’t have to do it all.

Why this matters in late December
It’s the end of December 2025. Fresh greens are expensive right now, and a lot of people are looking for ways to eat better without spending more. Microgreens deliver. A $3 packet of seeds yields multiple trays of nutrient-dense greens. You don’t need a garden. You don’t need sun. You need a tray, a windowsill, and six days.
If you failed before, try again. Use the weight. Soak less. Water from the bottom. You’ll see the difference by day four.
Start today, and you’ll be eating your own greens by New Year’s Day.