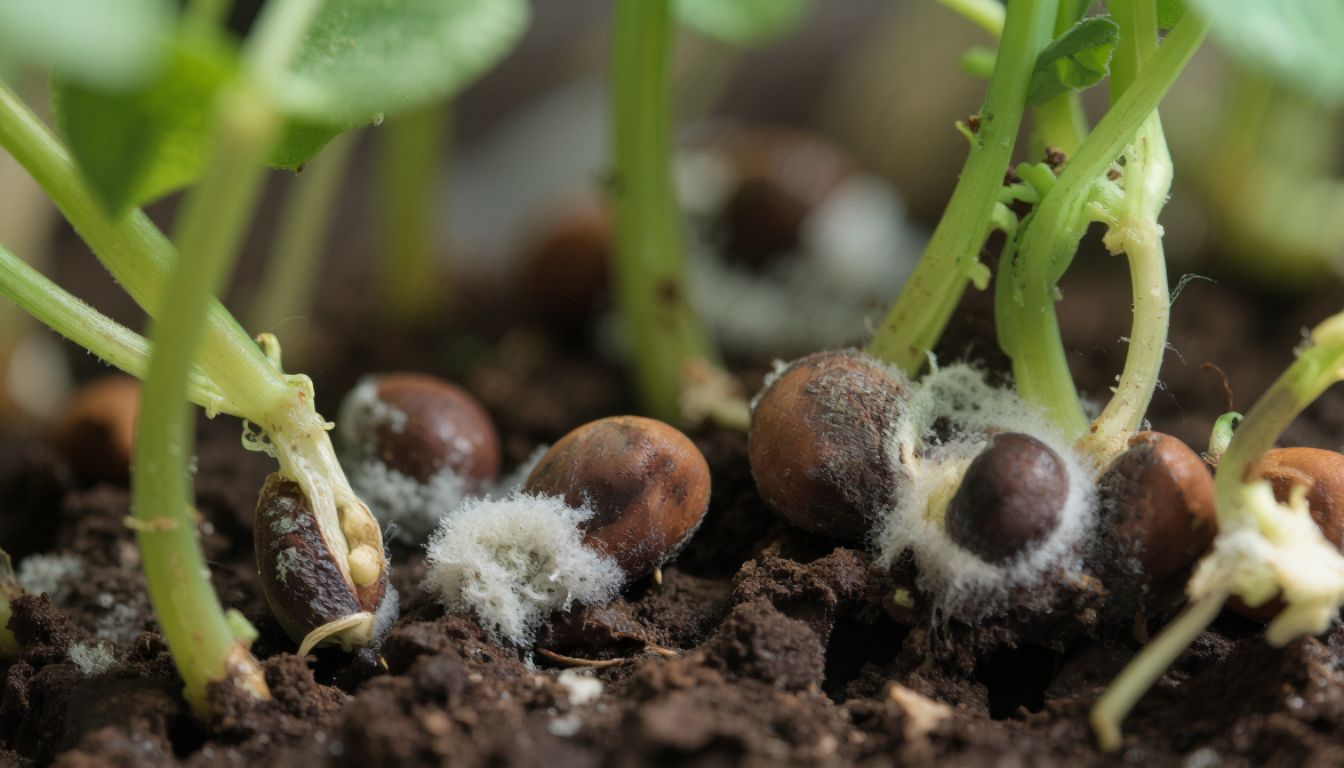
You open your microgreens tray on day three, expecting a lush green carpet, and instead you’re greeted by a slimy, foul-smelling mess. The stems are translucent, the roots are coated in white fuzz, and you wonder where you went wrong. Here’s the truth: you’re probably watering them like a houseplant, and that’s the fastest way to kill them.
Microgreens rot isn’t some mysterious plague. It’s almost always caused by one simple mistake that nearly every beginner makes—and even experienced growers slip up on when they’re not paying attention. The good news? Once you understand what’s happening beneath the surface, you can grow crisp, healthy microgreens every single time.
Why microgreens turn slimy so fast
Microgreens are not baby plants in the traditional sense. They’re seedlings harvested at their most vulnerable stage, usually between 7 and 14 days after germination. At this point, their root systems are shallow, their stems are tender, and their defenses against pathogens are virtually nonexistent.
When you overwater or create stagnant moisture conditions, you’re rolling out the red carpet for damping-off disease—a fungal infection caused by pathogens like Pythium and Rhizoctonia. These fungi thrive in wet, oxygen-starved soil. They attack the base of the stem, turning it soft, brown, and slimy. Within 48 to 72 hours, an entire tray can collapse.
Mold on the surface is often a secondary issue. It appears when humidity is too high and air circulation is too low. The white fuzz you see isn’t always harmful mold—it can be root hairs, which are easy to confuse. But if it smells sour or musty, you’re dealing with contamination.

The mistake almost everyone makes
Here it is: watering from above, too often, with too much water.
Most people treat microgreens like potted plants. They mist them daily, drench the soil, or leave them sitting in a puddle of water. This creates a constantly wet environment where fungi and bacteria multiply rapidly.
Microgreens need moisture, but they also need oxygen at the root zone. When soil is waterlogged, roots suffocate. Anaerobic conditions set in. Pathogens move in. The stems rot from the base up, and by the time you notice, it’s too late to save them.
Bottom watering is the solution most growers miss. Instead of pouring water over the seeds or spraying the surface, you place your grow tray inside a shallow reservoir tray and let the roots pull moisture up through capillary action. This keeps the soil moist without drowning the stems or creating surface humidity.
How to prevent slimy, moldy microgreens
Here’s a step-by-step approach that works for sunflower, pea shoots, radish, broccoli, and most other varieties.
Start with clean equipment. Wash all trays, domes, and tools with hot soapy water or a diluted hydrogen peroxide solution (1 part 3% peroxide to 10 parts water). Contaminated trays are a common source of repeat infections.
Use sterile, well-draining growing medium. Coconut coir, peat-based mixes, or hydroponic mats work well. Avoid garden soil or compost, which can harbor pathogens and compact easily.
Pre-soak seeds only when needed. Large seeds like sunflower and pea benefit from a 4–8 hour soak. Small seeds like broccoli and radish do not. Over-soaking can cause seeds to rot before they even sprout.
Water from the bottom. After seeding, mist lightly to settle seeds, then cover with a humidity dome or second tray for the blackout phase (usually 3–4 days). Once you uncover them, switch to bottom watering. Add water to the reservoir tray, let the soil wick it up for 10–15 minutes, then dump any excess. Do this once or twice a day depending on temperature and humidity.
Improve air circulation. Stagnant air is mold’s best friend. Use a small fan on low speed, positioned to move air gently across the trays without drying them out. This reduces surface moisture and keeps humidity in check.
Monitor temperature. Most microgreens prefer 65–75°F (18–24°C). Warmer temps speed up growth but also increase the risk of fungal problems. If your space is above 75°F, increase air circulation and reduce watering frequency.
Harvest at the right time. Don’t let microgreens sit in trays longer than necessary. Once they reach the true leaf stage, they become more prone to disease. Harvest, rinse gently, and store in the fridge.

What to do if you spot mold or slime
If you catch it early—within the first 24 hours—you may be able to salvage the tray. Increase air circulation immediately. Stop watering for 12–24 hours. If only a small section is affected, you can carefully remove those seedlings and isolate the tray.
If the slime has spread or the smell is strong, it’s safer to compost the batch and start over. Trying to save a heavily infected tray usually leads to disappointment and wasted time.
Disinfect the tray thoroughly before reusing it. Soak it in a hydrogen peroxide solution or white vinegar for at least 10 minutes, then rinse and dry completely.
The difference between root hairs and mold
This trips up a lot of growers. Root hairs are fine, white, fuzzy structures that grow from the roots. They appear in clusters, are uniform in texture, and disappear when you mist them lightly. They don’t smell.
Mold is irregular, can be white, gray, or greenish, and often has a musty or sour odor. It spreads across the soil surface and doesn’t go away when misted. If you’re unsure, smell it. Mold has a distinct funk.
Why this matters now
Microgreens have exploded in popularity over the past few years. Home growers, urban farmers, and health-conscious eaters are all jumping in. But the learning curve is steep, and the internet is full of conflicting advice. Many beginners give up after their first or second tray turns into a slimy disaster.
Understanding the watering mistake is the single most important thing you can learn. It’s not about buying expensive equipment or fancy seeds. It’s about creating the right environment—one where roots get moisture and oxygen, and pathogens don’t get a foothold.
Once you nail this, growing microgreens becomes almost foolproof. You’ll have fresh, crunchy greens in a week or two, and you’ll never have to deal with that slimy, rotten smell again.
Your next steps
If you’ve been struggling with microgreens rot, here’s what to do today:
- Clean and disinfect all your trays and tools.
- Switch to bottom watering starting with your next batch.
- Set up a small fan to improve air circulation.
- Start with an easy variety like radish or broccoli to build confidence.
Keep notes on each tray—what you planted, when you watered, and any issues you noticed. Over time, you’ll develop an intuition for what your setup needs. And once you get it right, you’ll wonder why it ever seemed hard in the first place.