If you tried growing chia microgreens and ended up with a slimy, clumped mess instead of crisp greens, you’re not alone. The gel coating on chia seeds turns into a sticky trap the moment water hits—and most first-timers don’t know the one trick that stops it.
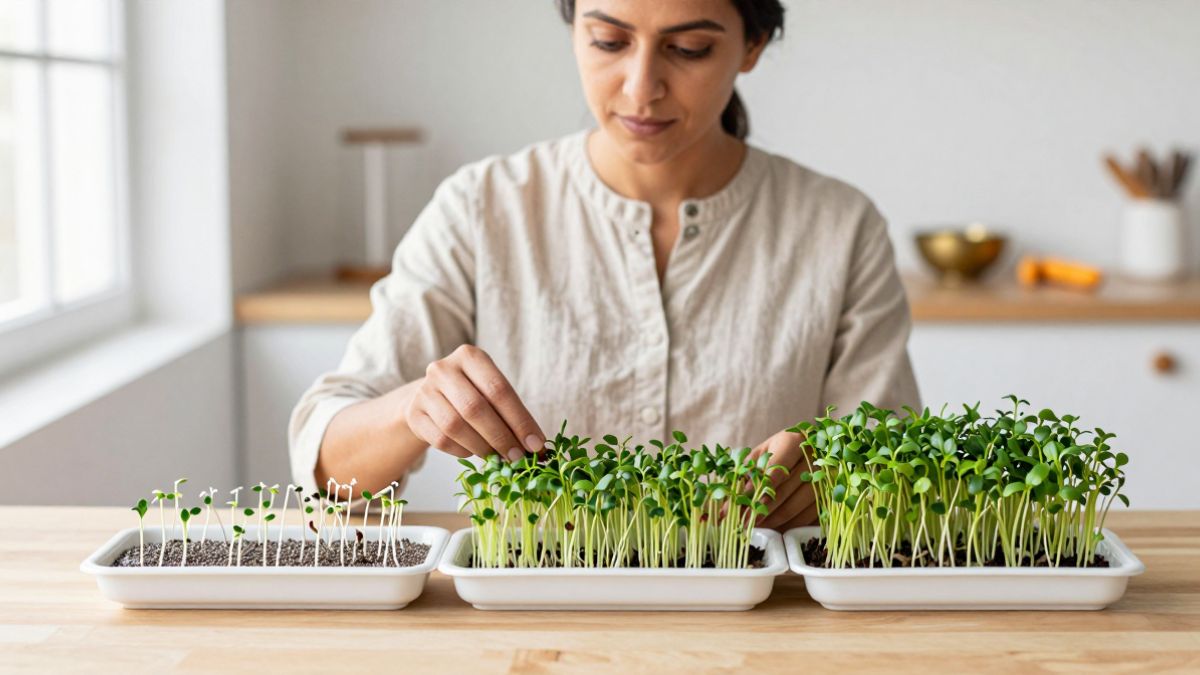
Chia microgreens are suddenly everywhere in India this December. Home gardeners, health bloggers, and urban farming communities are all talking about these tiny, nutrient-packed greens that taste like a mild, fresh version of the seed itself—slightly nutty, with a clean crunch. They’re showing up as toppings on dal, folded into raita, and scattered over salads. The appeal is simple: they grow in six days, need almost no space, and deliver a concentrated hit of omega-3s, fiber, and protein.
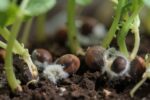
But there’s a reason so many people fail on their first attempt. Chia seeds release mucilage—a thick, gel-like coating—when wet. If you sow them like you would mustard or fenugreek microgreens, they’ll clump together, trap moisture, and rot before they ever sprout. The good news? Once you understand the gel problem, the six-day method is foolproof.
The #1 failure point: gel seed clumping (and the fix)
The mucilage isn’t your enemy—it’s actually what helps chia seeds stay hydrated in dry soil. But in a microgreens tray, it creates a suffocating layer that blocks airflow and invites mold.
The fix is simple: dry sowing. Instead of soaking or pre-rinsing your seeds, you scatter them directly onto a moist growing medium. The seeds will pull moisture from below without forming a gel blanket on top. This keeps the surface dry enough for air to circulate, while the roots get everything they need.
Here’s the exact method:
- Use a shallow tray with drainage holes (a standard 25 cm × 35 cm nursery tray works perfectly).
- Fill it with 2–3 cm of coco peat or a 50:50 mix of coco peat and vermicompost.
- Water the medium thoroughly, then let it drain for 10 minutes. The surface should be damp, not puddled.
- Sprinkle chia seeds evenly across the surface. Don’t press them in. Aim for dense coverage, but seeds shouldn’t be piled on top of each other.
- Mist lightly with a spray bottle—just enough to settle the seeds, not soak them.
- Cover the tray with a second tray or a damp cloth to block light and retain humidity.
No gel clumps. No rot. Just clean germination.

Exact tray setup: medium choice, moisture level, and airflow
Chia microgreens don’t need soil, but they do need structure. Coco peat is the best medium because it holds moisture evenly without compacting. If you want a nutrient boost, mix in vermicompost—but it’s optional for a six-day harvest.
Moisture level is critical. The medium should feel like a wrung-out sponge. Too wet, and the seeds drown. Too dry, and germination stalls. Check by pressing your finger into the medium—it should leave a slight indent but no pooling water.
Airflow is the hidden factor most guides skip. Even under a cover, stale air breeds mold. Lift the cover once a day for 30 seconds to let fresh air in. If you’re growing indoors in a humid room, prop the cover slightly with a matchstick or toothpick to create a tiny gap.
Place your tray in a spot with indirect light and stable temperature—ideally 20–25°C. A kitchen counter away from the stove, or a shaded balcony corner, works well.
Day-by-day timeline (day 0 to harvest) with visual checkpoints
Day 0 (sowing day): Seeds are scattered, misted, and covered. The tray is dark and humid.
Day 1: Nothing visible yet. The seeds are absorbing moisture and swelling slightly. Keep the cover on.
Day 2: Tiny white root tips appear. This is the sign that germination has started. Mist lightly if the surface looks dry. Keep the cover on.
Day 3: Roots are anchoring into the medium. You’ll see pale green shoots starting to push up. This is the day you remove the cover and move the tray into indirect light. A bright windowsill (not direct sun) or under a grow light works.
Day 4: The shoots are standing upright, pale green to yellow-green. The cotyledons (first leaves) are opening. Water by misting or bottom-watering—pour water into the tray and let the medium soak it up from below, then drain excess.
Day 5: The greens are dark green, standing 4–6 cm tall. The cotyledons are fully open and vibrant. This is harvest-ready for most uses. If you want slightly larger greens, wait one more day.
Day 6 (harvest day): The microgreens are 5–8 cm tall, deep green, and crisp. The stems are firm, not leggy. Cut them just above the medium with clean scissors.

Harvest + storage so they stay crisp (not slimy)
Harvest in the morning after the greens have had a few hours of light. They’ll be at peak crispness.
Cut just above the soil line. Don’t pull—roots will bring bits of medium with them. Rinse the greens gently in a bowl of cool water, then lift them out and lay them on a clean kitchen towel. Pat dry.
Storage is where most people lose the crunch. Chia microgreens are delicate. Store them in an airtight container lined with a paper towel to absorb excess moisture. Keep the container in the fridge. They’ll stay crisp for 3–4 days.
Don’t wash them until you’re ready to use them. Moisture is the enemy of shelf life.
Quick ways to use them: raita, dal topping, salads
Chia microgreens have a mild, slightly nutty flavor that works in both raw and lightly cooked dishes.
- Raita: Fold a handful into cucumber or boondi raita just before serving. The greens add color and a fresh bite.
- Dal topping: Scatter them over hot dal tadka or sambar. They wilt slightly but keep their texture.
- Salads: Toss with chopped tomato, cucumber, lemon juice, and a pinch of salt. The greens are the star.
- Smoothie bowls: Use them as a garnish on top of mango or banana smoothie bowls.
- Sandwiches: Layer them into grilled cheese or paneer sandwiches for extra crunch.
You can also blend them into chutneys or fold them into parathas before cooking—they’re versatile enough to experiment with.
Your six-day window starts now
Chia microgreens are one of the fastest, most forgiving crops you can grow at home—once you know the gel trick. Dry sowing, moisture control, and airflow are the three pillars. Follow the day-by-day timeline, and you’ll have crisp, nutrient-dense greens on your plate by the end of the week.
If you’ve been putting off trying microgreens because you don’t have space or time, this is your entry point. One tray, six days, and you’ll understand why they’re trending across India right now. Start today, and by December 29th, you’ll be harvesting your first batch.