Have you ever built a raised bed with such enthusiasm, only to find yourself wincing every time you need to weed the back row? Or worse—standing there with a watering can, realizing you can’t even reach half your plants without stepping on the soil you worked so hard to prepare?
We’ve all been there. And here’s the truth most gardening guides won’t tell you upfront: the success of your raised bed has almost nothing to do with the wood you choose or the soil mix you buy. It comes down to one deceptively simple measurement that most first-time builders get wrong.
Why so many raised beds become abandoned projects
Walk through any neighborhood in Delhi, Bangalore, or Pune during peak gardening season (yes, right now in December—perfect Rabi timing), and you’ll spot them: beautiful raised beds that looked Instagram-ready on Day 1, now overgrown or half-empty by Month 3.
The pattern is always the same. Someone gets inspired, builds a bed that’s too wide, too tall, or both. Within weeks, the reality sets in:
- Reaching the center becomes a yoga pose you didn’t sign up for
- Weeding the back means trampling your seedlings or doing awkward lunges
- Watering evenly turns into a guessing game with a hose that never quite reaches
- Harvesting means you’re either climbing in or leaving produce to rot because it’s just too much effort
This isn’t about laziness. It’s about ergonomics meeting reality.

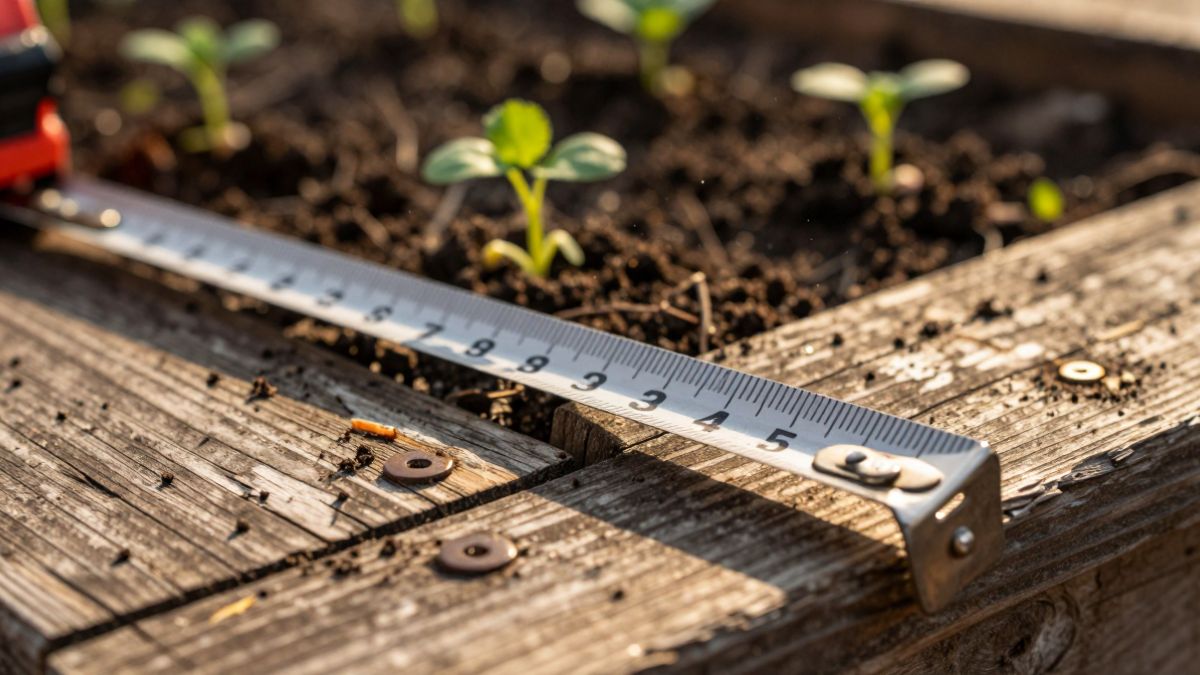
The one measurement that changes everything: Arm’s reach width
Here’s the secret: Your raised bed should never be wider than twice your comfortable arm’s reach from one side.
For most adults, this means:
- If you can access the bed from both sides: Maximum width of 120 cm (4 feet)
- If you can only access from one side (against a wall): Maximum width of 60 cm (2 feet)
This isn’t arbitrary. This is the distance you can comfortably reach without stepping into the bed, bending awkwardly, or risking a back injury. And in India’s climate where you’re tending beds almost year-round, comfort isn’t luxury—it’s sustainability.
The height matters too, but not how you think. Most guides recommend 30-45 cm (12-18 inches) for vegetables. But here’s what actually works:
- Standard mobility: 30-40 cm height is perfect for most crops
- Limited mobility or elderly gardeners: 60-75 cm height (less bending, easier access)
- Root vegetables (carrots, radishes): Minimum 30 cm depth
- Tomatoes, beans, bhindi: 40 cm+ gives roots room to thrive
The soil volume reality check (and why it matters for your wallet)
Let’s do the math because this is where costs spiral:
Example: A 120 cm × 240 cm × 40 cm raised bed needs approximately 1,150 liters of soil mix.
In Indian cities, quality garden soil costs roughly ₹15-25 per kg. You’re looking at:
- ₹4,000-6,000 just for soil (for ONE bed)
- Add ₹2,000-4,000 for wood/bricks/stone materials
- Total: ₹6,000-10,000 per raised bed (and that’s DIY)
Here’s the smarter approach we use:
- Start smaller: Two 60 cm × 120 cm beds cost less than one massive bed and let you test what actually works for your space
- Fill strategically: Bottom layer of coconut coir or compost (cheaper bulk fill), top 20 cm with premium mix
- DIY soil mix: 40% regular garden soil + 30% vermicompost + 20% cocopeat + 10% neem cake = ₹8-12/kg vs store-bought at ₹25/kg

Cost comparison: DIY vs ready-made
DIY Wood Raised Bed (120 × 240 × 40 cm):
- Treated wood planks: ₹3,000-4,000
- Corner brackets/screws: ₹500
- Labour (if hired): ₹1,000
- Total: ₹4,500-5,500
Ready-Made Metal/Composite Bed (same size):
- ₹8,000-15,000 depending on brand
- Often includes warranty but harder to customize
Brick/Stone Border (budget option):
- Recycled bricks: ₹2,000-3,000
- Looks rustic, permanent, but less flexible
Our take: DIY wood wins for beginners. You can adjust dimensions before committing, and if you realize you built it too wide (see: the whole point of this article), you’re not stuck with an expensive mistake.
What to plant in your first season (December-February is ideal)
You’ve built the bed correctly. Now don’t sabotage yourself with difficult crops. Start with these foolproof winners for Rabi season:
Immediate gratification (harvest in 30-45 days):
- Palak (spinach): Thrives in raised beds, minimal care
- Methi (fenugreek): Grows fast, cut-and-come-again
- Radishes: Perfect for testing your soil depth
- Coriander: Plant every 2 weeks for continuous harvest
Satisfaction crops (60-90 days):
- Tomatoes: One properly staked plant = 5-8 kg over the season
- Capsicum: Loves the drainage of raised beds
- Beans: Vertical growth saves space, massive yields
- Cabbage: Looks impressive, relatively easy
Pro tip for Indian conditions: Plant marigolds along the edges. They deter pests, look beautiful, and you can use the flowers for puja or composting.
The maintenance reality nobody talks about
Raised beds aren’t “set it and forget it.” Here’s what actually happens:
Every week:
- Top 5 cm of soil dries faster than ground-level gardens (especially in summer)
- You’ll water 20-30% more frequently—plan for drip irrigation or ollas if possible
Every season:
- Soil level drops by 5-10 cm due to decomposition (this is normal)
- Top up with compost mix before replanting
Once a year:
- Check wood for termite damage (huge issue in humid regions)
- Reapply wood preservative if using untreated lumber
- Test soil pH—add neem cake or lime as needed
The upside? This sounds like work, but it’s actually easier than managing ground-level plots. Everything is contained, visible, and within arm’s reach. Which brings us back to that one measurement.
Your action plan for this week
If you’re building from scratch:
- Measure your comfortable reach while standing (shoulder-relaxed, arm extended)
- Double that number if you can access both sides = your maximum bed width
- Mark out the dimensions with string before buying materials
- Do the soil volume calculation before you commit (length × width × height ÷ 1000 = liters needed)
If you already have a too-wide bed:
- Add a stepping stone path down the middle to create two narrow access zones
- Or divide it into two separate beds with a wood divider
The goal isn’t perfection. It’s creating a system you’ll actually use six months from now, when the initial excitement fades and you’re just trying to get dinner ingredients on a Tuesday evening.
That’s the measurement that matters. Not the Pinterest-perfect dimensions. The one you can reach without thinking twice.